Setting Up Email on Apple iOS
This article will configure an IMAP account on your iOS device. We recommend that you use IMAP when configuring and managing your hosted mail account with an email client.
Note: The images in this article will show an iPhone 5s running iOS 7. Though screens on other iOS devices will differ in appearance, the process is the same.
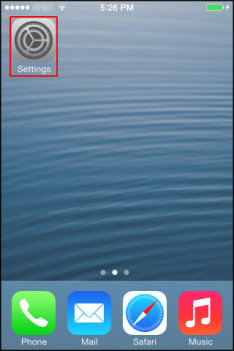
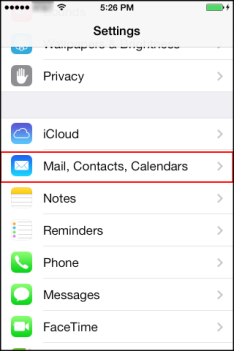
Step 1. From the home screen on your device, tap Settings, and then tap Mail, Contacts, Calendars.
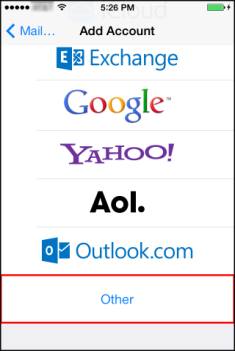
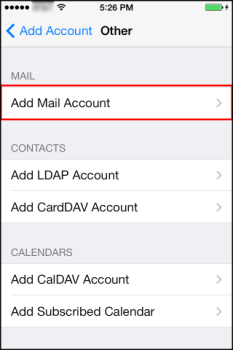
Step 2. Tap Add Account > Other > Add Mail Account.
Step 3. On the New Account screen, enter the following information, and then tap Next.
- Name – Enter in your first and last name. This name will appear in the From field of messages you send.
- Email – Enter your entire email address (for example, customer@pine-net.com).
- Password – Enter the password for your email account.
- Description – Enter a descriptive name for the account (for example, Pine-Net). This description will only be visible to you.
Step 4. After the device looks up your account, tap IMAP at the top of the screen.

Step 5. Enter the following information in the Incoming Mail Server and Outgoing Mail Server fields:
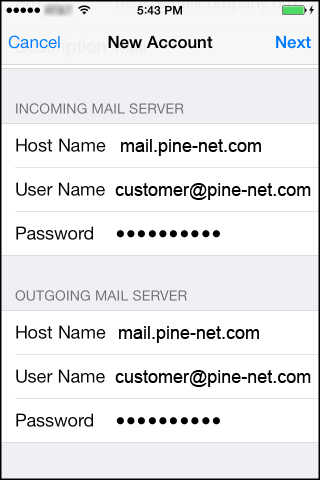
- Host Name – Enter the following secure server name: mail.pine-net.com
- User Name – Enter in your entire email address (for example, customer@pine-net.com)
- Password – Enter in the password for your email account.
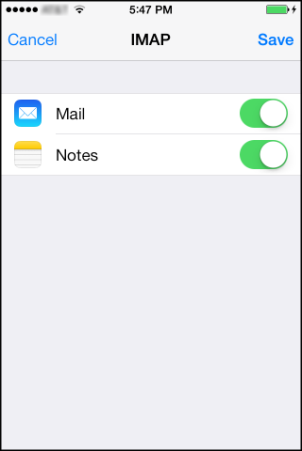
Step 6. Tap Next and then tap Save. The device verifies your settings. After the settings are verified, the Mail & Notes screen is displayed.