Setting Up Email on Mac Mail
The following article will show you how to setup your Pine-Net email account using your Mac Mail email client. Let’s take a look at the steps below on how to configure your account:
- First thing you’ll want to do is open up Mac Mail and select Mail and Accounts.

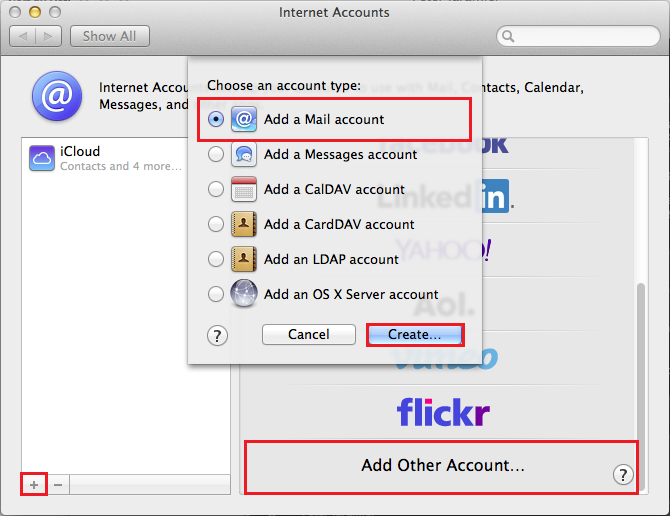
- On Internet Accounts, click the + sign or Add Other Account. Select Add a Mail account and then click Create.
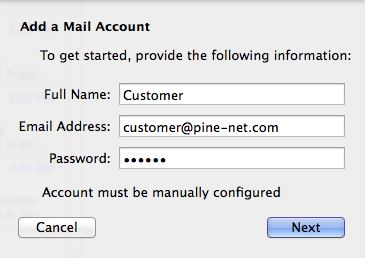
- Enter the required information on Add a Main Account. Click Create. After verification, you will be asked to manually configure account. Click Next.
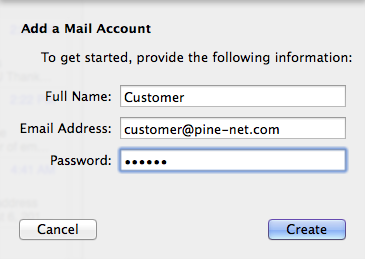
- Full Name – Enter in your first and last name. This is the name that will appear in the From field of messages you send.
- Email Address – Enter in your entire email address (e.g. customer@pine-net.com).
- Password – Enter in the password associated for your email account.
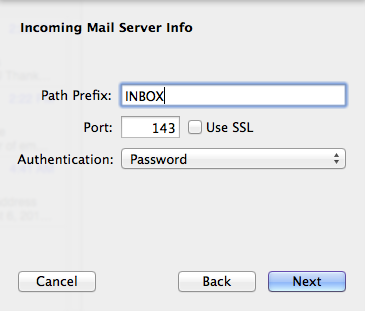
- Enter the Mail Server Info
- Account Type – Click IMAP button.
- Incoming mail server – Enter the following: mail.pine-net.com, Path Prefix: INBOX, Port: 143, leave Use SSL unchecked, Authentication: Password
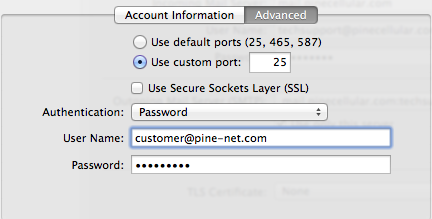
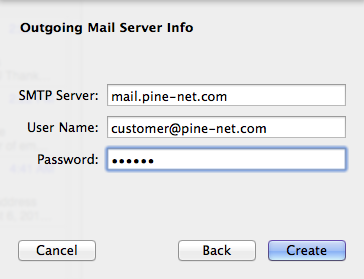
- Outgoing mail server (SMTP) – Enter in the following: mail.pine-net.com, Port: 25, leave Use SSL unchecked, Authentication: Password
- User Name – Enter in your entire email address (e.g. customer@pine-net.com).
- Password – Enter in the password for the account you’re setting up.

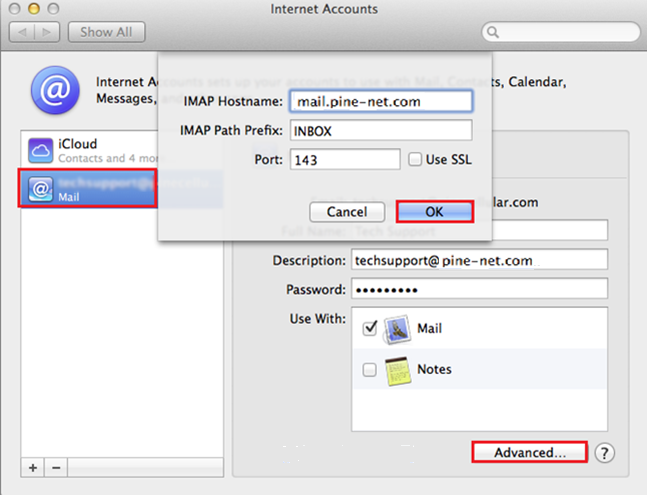
- Ensure that Incoming Server settings are correct. Select the account and click Advanced. Verify the IMAP settings. Click OK.
Ensure that Outgoing Server settings are correct. Click Mail and Preferences. On Accounts, click Outgoing Mail Server (SMTP) to open the drop down box. Click Edit SMTP Server List.
- Ensure that Outgoing Server settings are correct. Click Mail and Preferences. On Accounts, click Outgoing Mail Server (SMTP) to open the drop down box. Click Edit SMTP Server List.