Windows 7/Vista – Wireless Connection Guide
This document will provide basic wireless network connection procedure for the Microsoft Windows 7 and Vista operating system.
Step 1: Open the Control Panel.
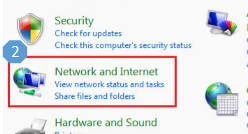
Step 2: Locate the category Network and Internet or Network and Sharing Center.
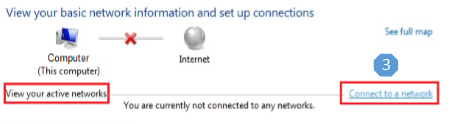
Step 3: On Network and Sharing Center, locate View your active networks and click Connect to a network. If the PC is connected to another network, click Connect or Disconnect.
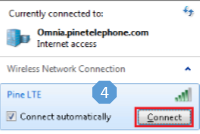
Step 4: The computer will search for all available SSID. Select the SSID “Pine LTE”. Ensure that “Connect automatically” is check marked. Click Connect.
Step 5: Enter the Wi-Fi Key. (Hint: There are no letter O in the key. All letters are UPPERCASE.)
Step 6: Click Ok to establish connection.
Related Links
- BEC 6200WZL – Quick LAN and WLAN Connection Guide
- Windows 8 – Wireless Connection Guide
- Macintosh OS X – Wireless Connection Guide